 Dream kitchen with painted cabs
One of the things I get asked most often is “can you tell me step by step how to paint my cabinets?” um. I have successfully avoided answering this question here for 18 months. And I’m finally comfortable with sharing how I paint my cabs. It’s not perfect and Better Homes and Gardens’ isn’t gonna come calling to get me to write an article on it but it works, and it’s my way. And Remodeling Guy, for your own sanity, please, stop reading now.

I’ve painted cabinets in 8 different places in 4 different homes {not to mention the paint I’ve applied to rooms of dark paneling, brick fireplaces and an entire wall of dark shelving–mostly painted all by myself in the presence of young children}. I’ve never regretted it. I’ve never done it by the book and I might not have ever done it the same way twice.
For me, painting the cabinets was a must. Either the cabinets were so old and decrepit, dirty, ugly, or some other unacceptable thing that cabinets painted the wrong way were still a better choice than what was there. If you have new mahogany cabinets you probably don’t want to paint those anyway.
Painting Cabinets: Nesterized
1. Make sure the cabinets are clean. Soap and warm water works just fine. Now let em dry completely. If you have sandpaper, rough em up, if not, skip this step. Told ya it’s not scientific.

2. Get some Kilz Latex primer and prime those babies. I only prime if I’m doing a light color–for red or black cabs, I don’t even prime. I usually use a small sponge roller brush in conjunction with a regular paint brush for the hard to reach parts.
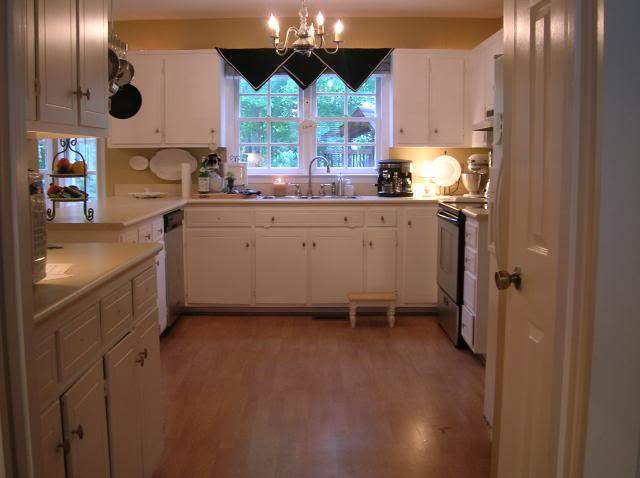
3. Paint the cabs–front of doors, inside of doors and anything that can be considered the front of the cabs. I don’t paint the inside. I have never, I repeat, NEVER removed the doors. I would recommend removing the doors in a really nice, big, kitchen that you probably won’t be using my method for anyway. It’s hard to not paint over the hinges if the doors are attached but it is possible. See that photo of my white kitchen up there and how the doors don’t close right? That’s because the people before us removed the doors and didn’t keep track of which doors went where. Very tricky. I just leave em on but understand, this act is considered heretical in the world of painting cabs.
4. Let the paint dry for awhile. I never waited long enough, only a day or so but I hear tell you should wait longer.
5. Paint another coat. And another if you can still see through the paint.
6. Save the paint so you can do touch ups over the years. {I like to keep one loaded brush in my refrigerator at all times, shhhh, don’t tell remodeling guy} so I can touch something up at any time.
7. Be happy that your cabs are fresh and clean and look 367% better than they did.
Tell your husband, mother in law and next door neighbor that It Doesn’t Have to be Perfect to be Beautiful.
More painted cabinet inspiration from the real experts:


The top photo on this post was in my idea file and I cannot find the source. Please forgive me–if you know of the source, let me know and I’ll give credit! Thanks!
Don’t forget, Lampapalooza is this Thursday! Get your lamps ready!